Getting a clean-cutting font isn’t that easy. Even though you pay good money, the font designer isn’t careful about creating a clean-edged design. Here comes Cricut Design Space, an amazing application for cleaning edges.
I have seen many people prefer this digital application when it comes to cleaning critical mistakes. And trust me, I was surprised as I did fix fuzzy edges in the design space. If you are a bit skeptical about this application, let me explain the basics first.
Cricut Design Space is a digital application for design. Most people use it to set up projects with a Cricut machine. This design tool provides a set of features for creating and modifying projects. The thing I loved most about this application is you can get an extensive library of fonts, images, and pre-designed projects.
You can install Cricut Design Space on your computer, tablet, or smartphone. Now, if you are a newbie, don’t worry. There are so many easy-to-create projects in this application. In this case, you don’t have to be a pro designer.
Another thing I love about this advanced tool is it will let you design something both online and offline. You can create various designs including text layout, pre-designed fonts, and original designs.
Now, come to the point. It’s easy to clean SVG in Design Space when you follow the right steps. That’s why I am sharing the easiest way to smooth edges by using this fantastic tool.
Hence, I will also share some crucial tips you can follow if you are a newbie. Make sure you read the guide thoroughly before you implement the steps. So, let’s get started.
Don’t Miss: How to Fix Project Incompatible in Cricut
Clean SVG in Cricut Design Space – Step By Step
As I noted, it’s very easy to clean in the Cricut design space. You don’t need to understand rocket science to complete this process. When you follow my steps, it will take a couple of minutes to solve your issue.
Before you start the process, make sure the Cricut Design Space app is installed on your device. If you haven’t installed it, go to the official website and download the suitable version. In the following list, I’m sharing the step-by-step guide to fixing fuzzy edges in design space. Let’s find out:
Step 1:
First, open the Cricut Design Space app on your computer. Now, go to the top right corner of your screen and click on the ‘New Project’ button.
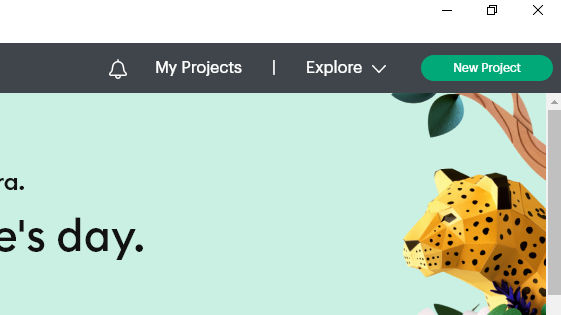
You can also click on the ‘My Projects’ button if you have used this app before. It’s important as you will upload a new file.
Step 2:
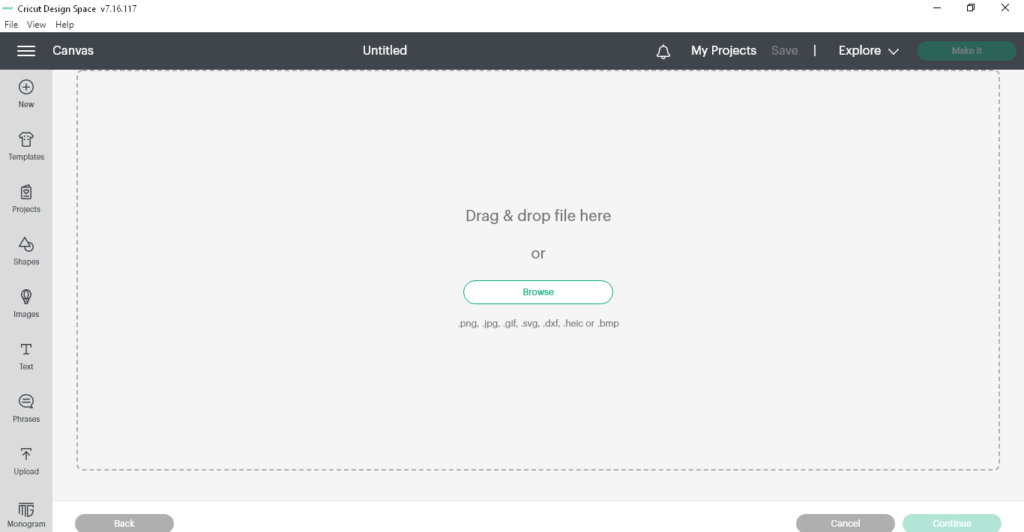
After clicking the ‘New Project’ option, a new canvas page will be opened. Check, there’s a sidebar with some essential options on the left side of your screen. Locate the ‘Upload’ option and click on it to upload a file as per your preference.
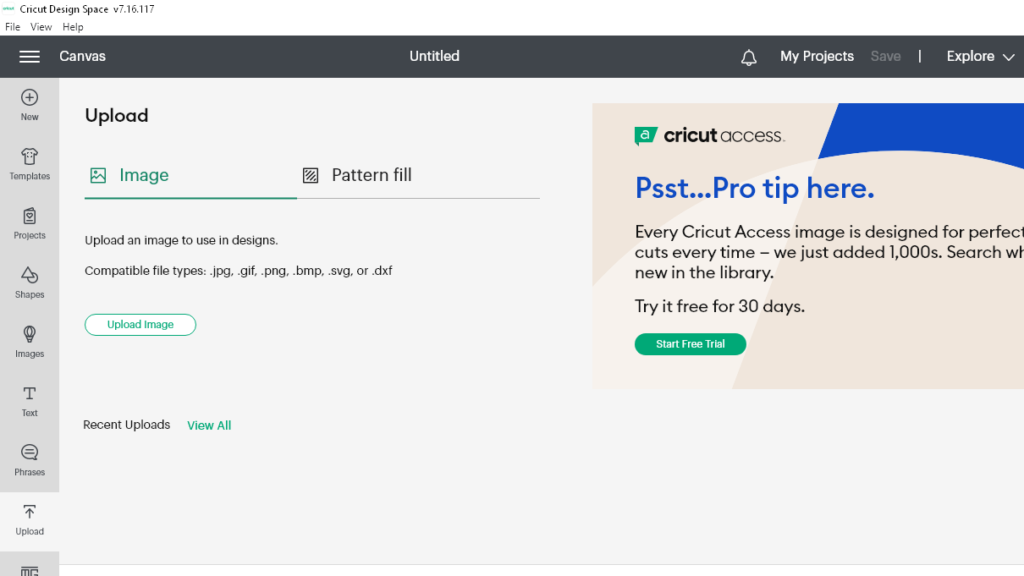
Step 3:
When you click on the ‘Upload’ option on the left sidebar, a new page will be opened. There, click on the ‘Upload Image’ button. Then, click on the ‘Browse’ option to browse files from your computer.
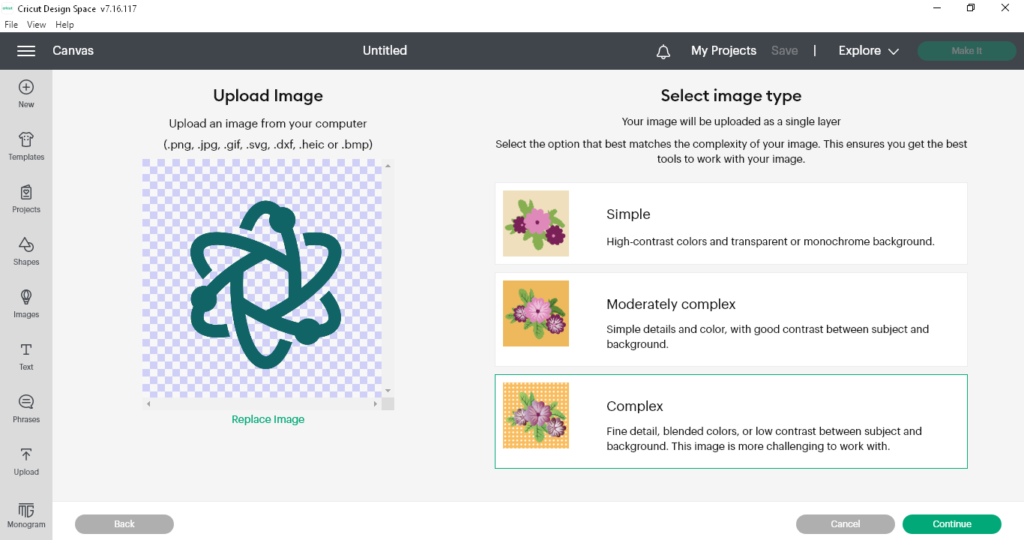
Step 4:
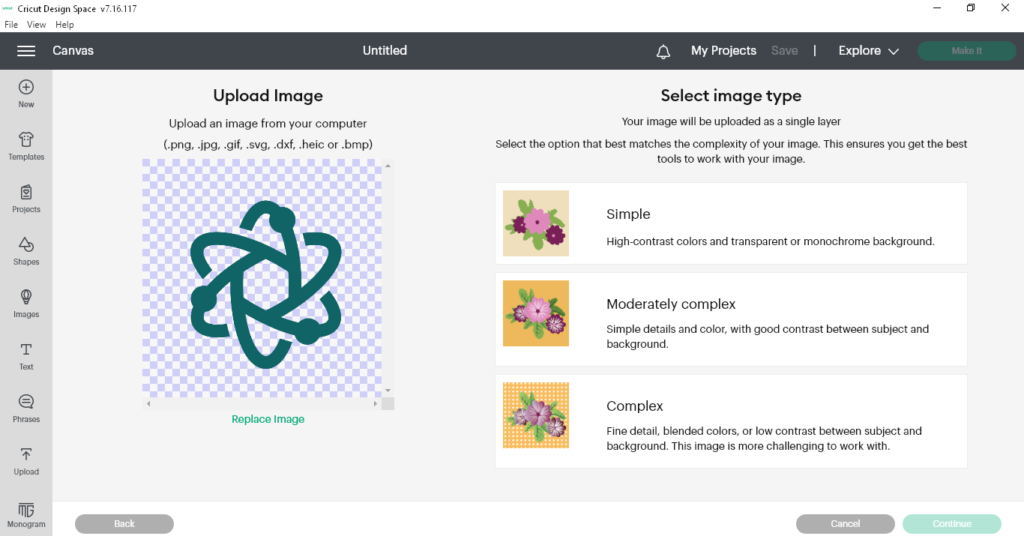
After uploading a file from your computer, you have three options to choose from; Simple, Moderately complex, and Complex. In this case, click on the ‘Simple’ option and check the edges are clean enough.
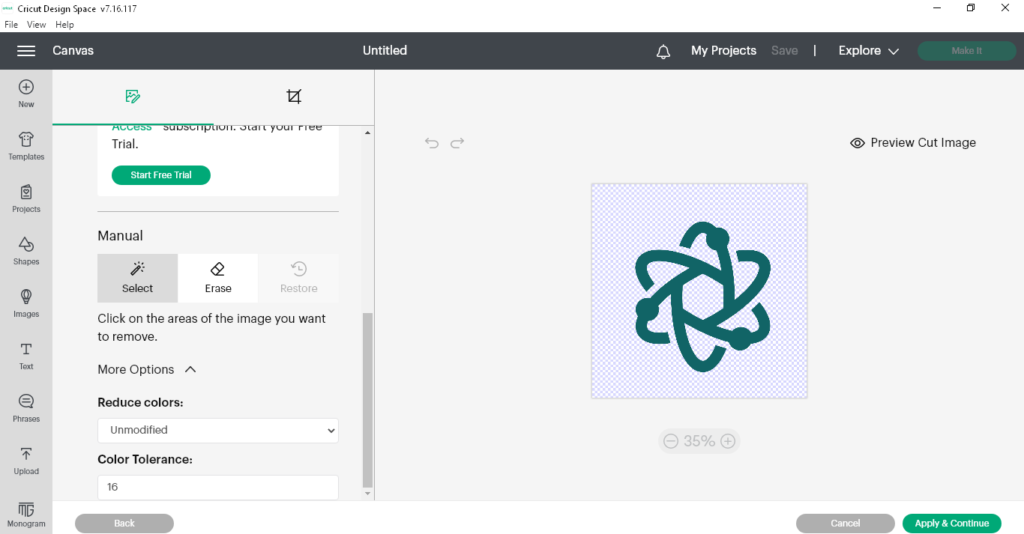
Step 5:
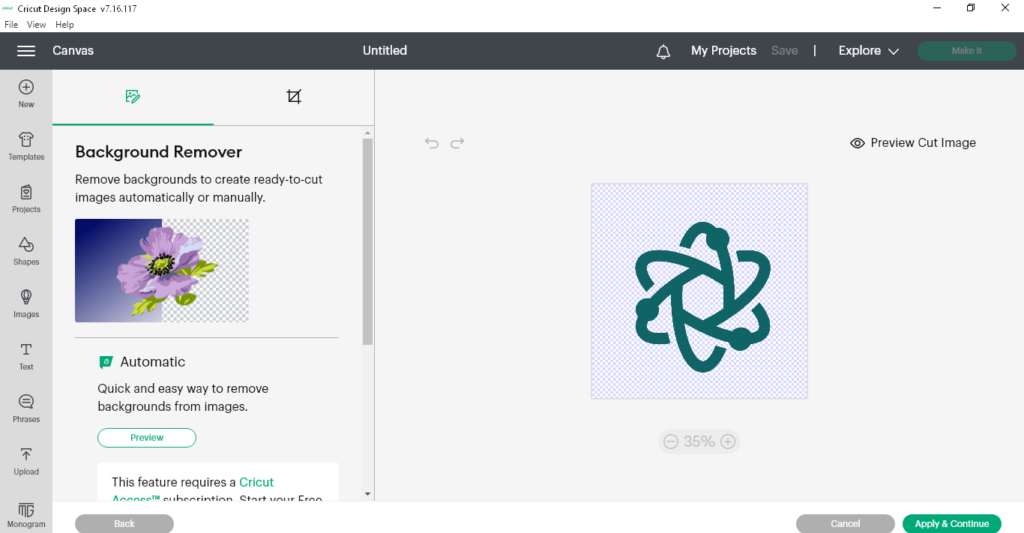
Now, you can edit the image as per your requirement. On the other hand, you can also add elements from the left sidebar. If the image is okay, click on the ‘Apply & Continue’ button at the bottom right corner of your screen.
Step 6:
When you are done with editing, Cricut Design Space gives you a chance to compare the cut image with the print version. This step is very essential for taking your final decision. Make sure you check if everything’s okay.
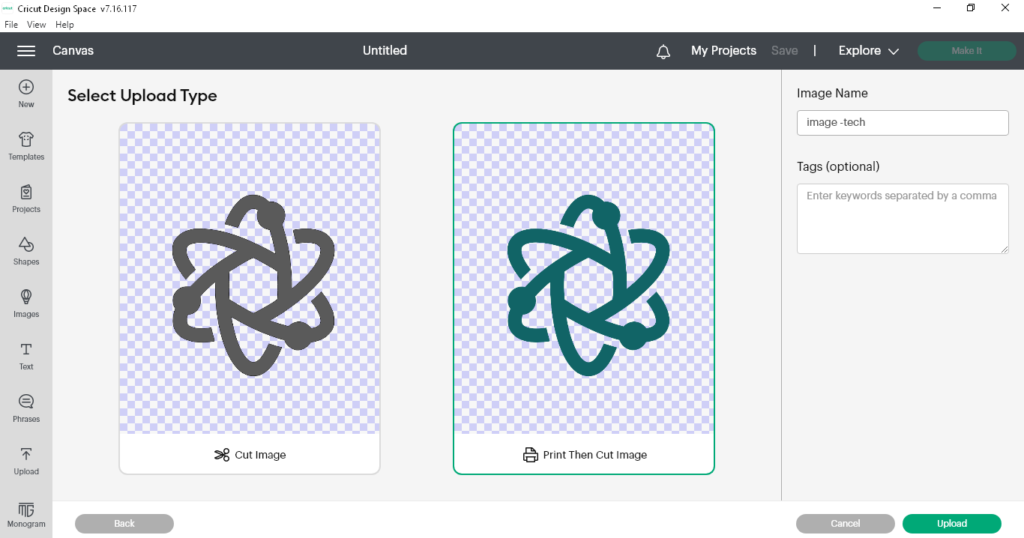
From here, you can upload the image by selecting and giving the file a name. After doing this, select the ‘Upload’ button to start the process.
Step 7:
If the previous trick didn’t work and the edges are still not clear on your image, you can go for another option. In most cases, the issue can’t be resolved with the Simple option, especially when you designed the image by yourself. First, upload the same file by following the same steps. Now, select the ‘Complex’ option.
Step 8:
Now, you can see the canvas. On the left side of the canvas, you can see the ‘reduce colors’ and ‘color tolerance’ options under the Manual section.
See: Color Tolerance in Cricut (Explained)
Here, change the ‘Reduce Colors’ to 2 and the ‘Color Tolerance’ to 200. Now, you can select the ‘Apply & Continue’ option. Lastly, follow the same steps to upload the image.
If you are using Cricut Design Space for the first time, you have to follow some crucial tips. That’s why I’m sharing some useful tips you can apply to get the best result. Let’s find out:
- To get the best clean-cut result, you have to choose the complex option. Then, click on the ‘more options’ and change the color to 150-200 and the ‘reduce colors’ to 2.
- In most cases, the issue will be resolved by choosing the Simple option
- If you want to get the best result, try to add a very small rounded offset
- The best way to smooth edges in Cricut Design Space is a Gaussian blur
- If you want to edit your uploaded image in the Cricut Design Space application, you can use a third-party application.
- The mobile version of Cricut Design Space doesn’t provide all features. If you want the best result, you have to choose the desktop or tablet version.
Conclusion
Well, it doesn’t take a lot of time when you follow the right steps. The thing I loved most about this app is there are some advanced features available. Follow my steps to get the best result. If you want to edit an uploaded image, there are some options available in this app. Alternatively, you can also edit and design jagged edges by using a third-party application.